
 Save
Save
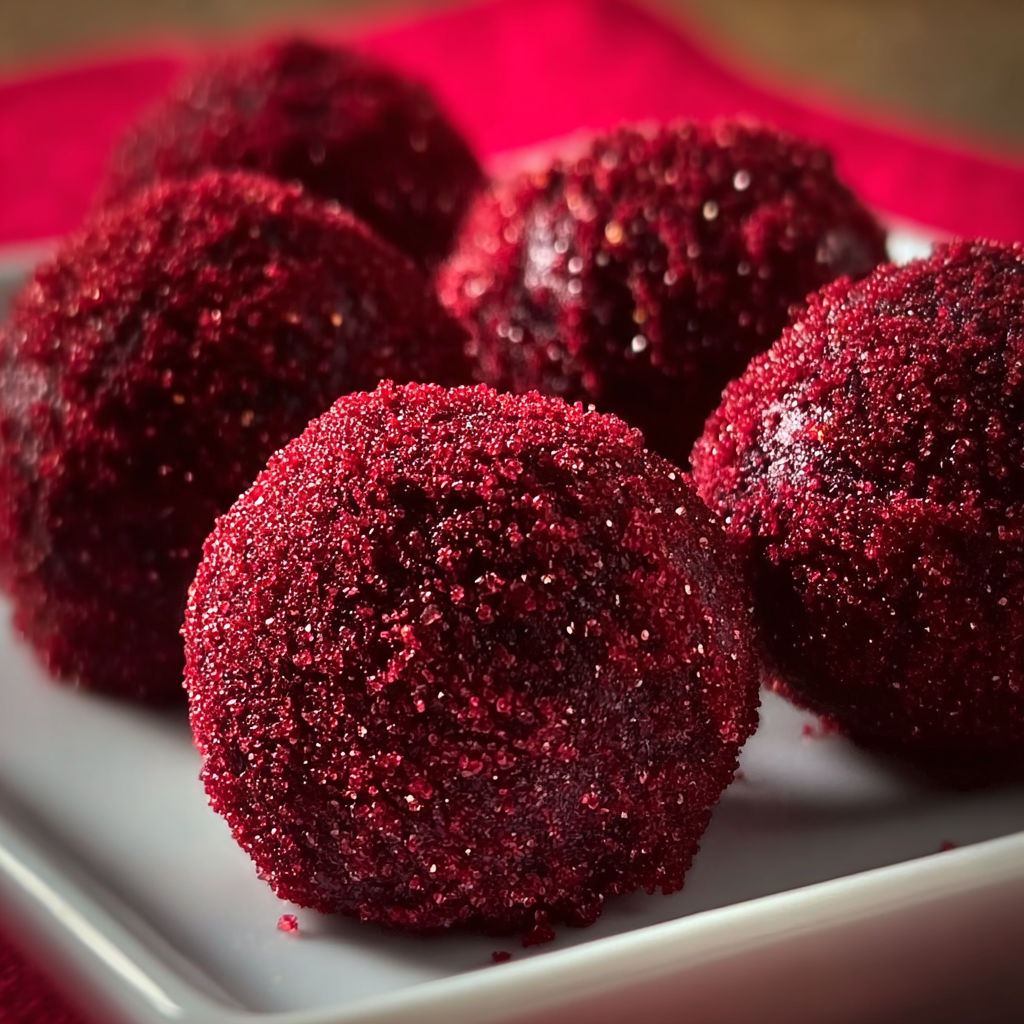
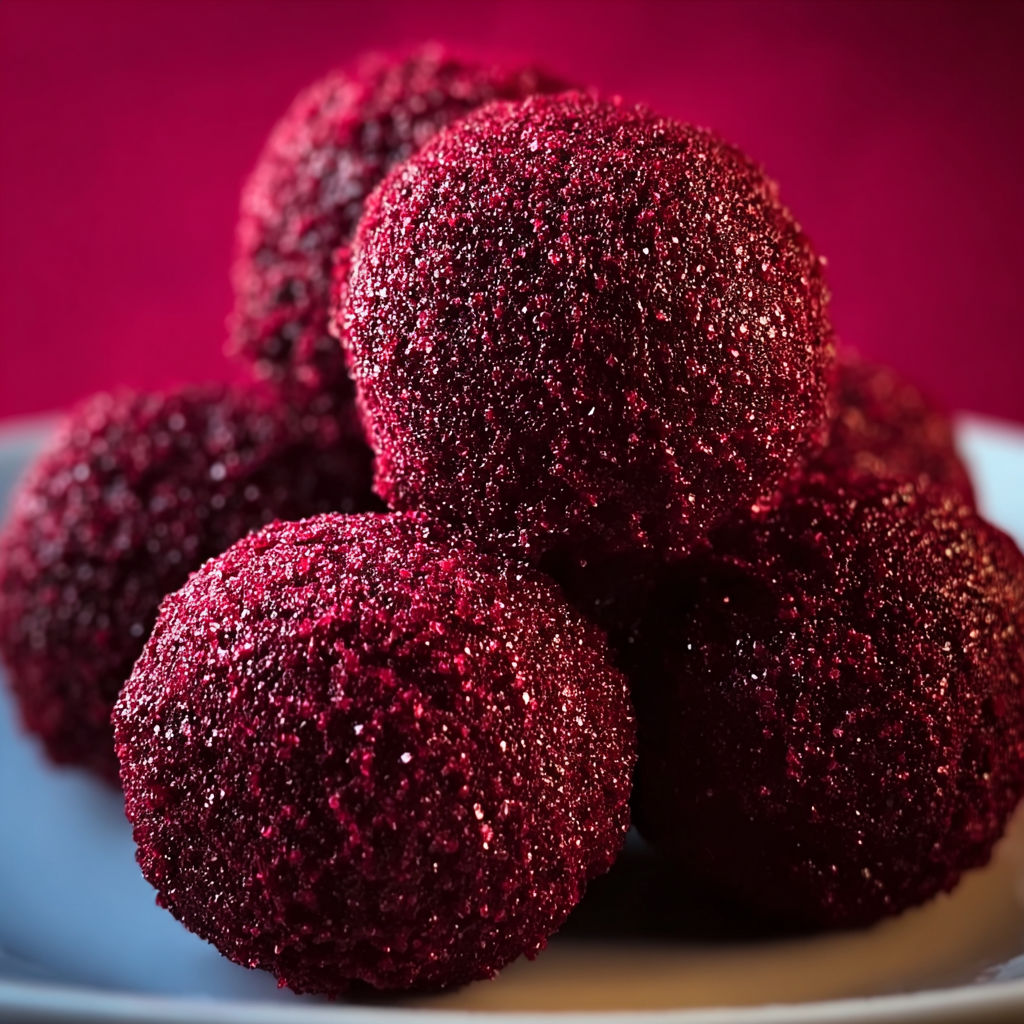
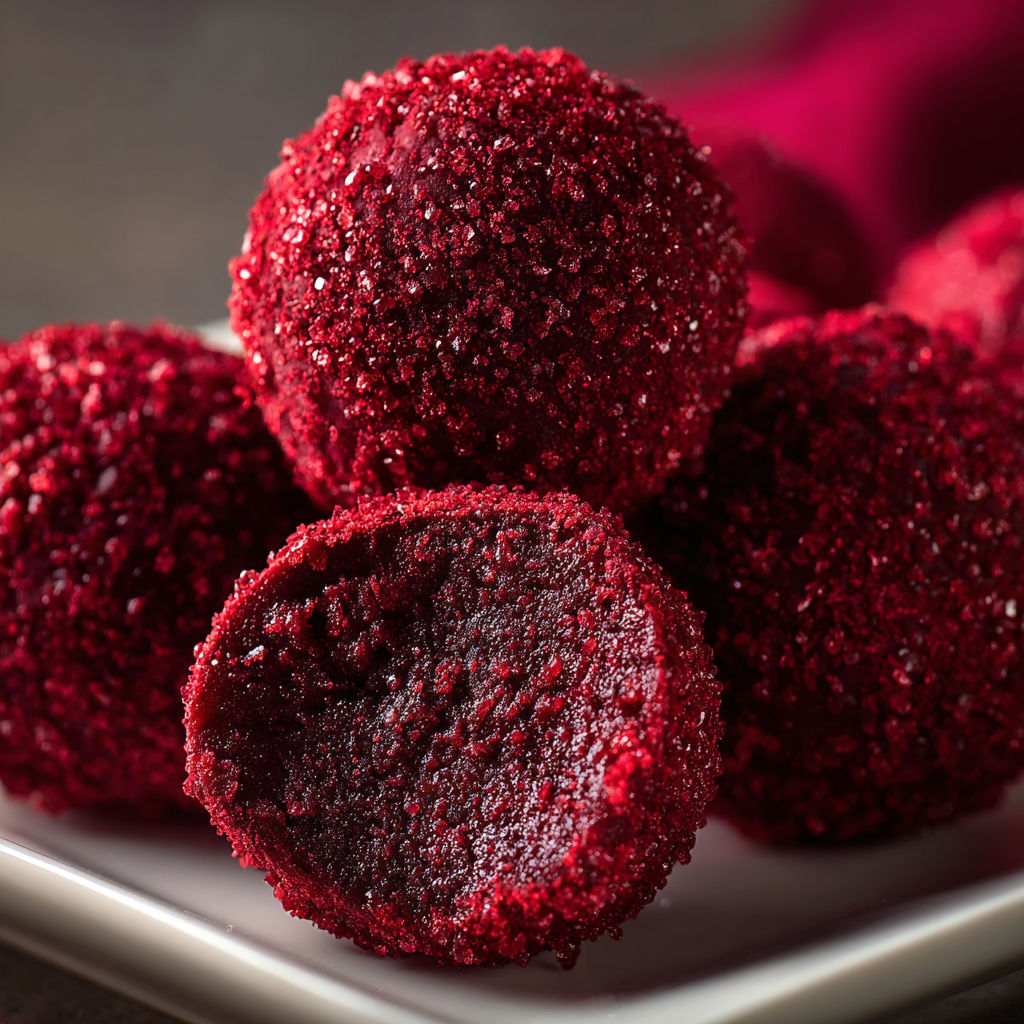
These Red Velvet Truffles are my favorite way to turn a simple cake into a rich bite-sized treat for any occasion. Each truffle bursts with classic red velvet flavor and a tangy cream cheese center, all wrapped in a chocolate shell. Whether I am whipping these up for Valentine’s Day or just a cozy weekend, they disappear in minutes—everyone asks for more.
Every time I serve these at gatherings, friends are amazed at how bakery-worthy they turn out. I remember making a double batch for my sister’s birthday once, and not a single truffle was left behind.
Ingredients
- All-purpose flour: the backbone for a tender cake base choose a brand with good reviews for better texture
- Unsweetened cocoa powder: brings the signature red velvet cocoa taste Dutch-process gives the deepest flavor
- Granulated sugar: sweetens the cake and creates a delicate crumb aim for extra fine sugar
- Baking soda: makes the cake light and fluffy check the expiry date for best results
- Salt: sharpens the chocolate notes opt for kosher salt for consistency
- Butter: lends richness and moisture use real unsalted butter for pure taste
- Large egg: binds the batter together always use fresh eggs for best results
- Red food coloring: creates the classic vibrant look gel food coloring gives the boldest color
- Vanilla extract: rounds out the flavors pure extract adds warmth to the overall taste
- Cream cheese: delivers the trademark tang let it come to room temperature for easier mixing
- Powdered sugar: sweetens and thickens the filling sift before adding for smoothness
- Semi-sweet chocolate chips: form the decadent shell choose a quality brand that melts smoothly
- Sprinkles or chopped nuts: bring a festive touch choose contrasting colors or flavors for extra flair
Instructions
- Prepare the Batter:
- Cream the softened butter with granulated sugar in a large bowl until pale and fluffy This process takes about three to four minutes and helps the cake stay tender
- Mix Dry Ingredients:
- In a separate bowl whisk together flour cocoa powder baking soda and salt until evenly combined This makes sure leavening and flavor are distributed throughout the batter
- Combine Ingredients:
- Gradually incorporate the dry mixture into the bowl with the creamed butter and sugar Mix gently to avoid overworking the batter which could make the cake dense
- Add Egg and Flavors:
- Crack in the egg then pour in red food coloring and vanilla extract Beat until the mix transforms into a vibrant smooth batter Scrape down the bowl to catch all ingredients
- Bake:
- Spread the batter evenly into a greased nine inch round cake pan Tap the pan to remove air bubbles Bake at three hundred fifty degrees Fahrenheit for roughly twenty to twenty five minutes Use a toothpick to test for doneness the center should come out clean or with a crumb or two
- Cool the Cake:
- Let the hot cake cool fully in the pan for at least thirty minutes before turning out onto a rack The cake will be much easier to handle once cooled
- Prepare the Filling:
- In a clean bowl beat softened cream cheese until smooth and fluffy Slowly add powdered sugar whisking constantly until creamy This will be the glue for the truffle interior
- Crumble the Cake:
- Once the cake is cool break it into fine crumbs using your hands or a fork Watch for any large clumps and crumble them down for uniform texture
- Combine Cake and Filling:
- Spoon the cream cheese mixture over the cake crumbs and use clean hands or a spatula to mix until well combined The mixture should hold its shape easily
- Shape the Truffles:
- Roll the dough into small one inch balls setting them on a parchment lined baking sheet Space each ball so they do not stick
- Chill:
- Refrigerate the truffle balls for at least one hour to firm them up This helps them hold their shape when dipped
- Melt the Chocolate:
- Using a microwave safe bowl warm chocolate chips in thirty second bursts stirring after each session Continue until the chocolate is silky smooth
- Coat the Truffles:
- Dip each chilled truffle into melted chocolate Use a fork to roll and lift them out allowing excess chocolate to drip off Return each to the baking sheet
- Decorate:
- While the chocolate is still glossy sprinkle over your decorations or nuts They will stick best before the chocolate hardens
- Chill Again:
- Give the coated truffles a final thirty minute chill in the fridge so the chocolate sets with a crisp snap
I always get excited about the cream cheese center It is so velvety and perfectly tangy against the cake and chocolate My little cousin loves rolling the truffles with me every year at Christmas and it is become our kitchen tradition
Storage and Leftover Tips
Keep finished truffles in an airtight box in the refrigerator where they stay fresh for up to five days If stacking use pieces of wax paper between layers to prevent the shells from sticking together For longer keeping stash in the freezer and thaw overnight in the fridge whenever cravings hit
Easy Ingredient Swaps
If you are out of cream cheese mascarpone also works for a milder taste You can use white chocolate for coating if you want a colorful finish For a gluten free batch a good quality gluten free all purpose blend stands in easily
Perfect Ways to Serve This
Serve these truffles after dinner with coffee or tea for an elegant finish to any meal They make lovely gifts tucked into small boxes lined with tissue paper For bigger celebrations set them out in mini cupcake liners on dessert trays to impress your guests
The Story Behind This Recipe
Red velvet has always been the ultimate treat in our house but turning it into truffles made dessert even more fun It all started when I wanted a no fork no crumb mess solution for a birthday party and the idea for portable red velvet bites was born Now they are my most requested sweet
Adapting for Every Season
Change up the outer coating or sprinkles to match the occasion Try festive reds and pinks for winter holidays pastel shades for spring or orange flecks for Halloween They look lovely with gold dusting sugar at New Year’s gatherings
Helpful Notes
Roll the truffle dough gently with your hands to prevent cracks If the chocolate shell sets too quickly rewarm the bowl briefly Letting kids help with dipping and decorating always leads to smiles
What People Are Saying
Friends say these taste like a bakery treat but so much better fresh My aunt cannot believe they are homemade and always asks for the secret ingredient hint it is that tangy cream cheese center
With these easy steps and tips your homemade red velvet truffles will be a hit wherever you share them. Enjoy baking and gifting these delightful little treats.
Recipe Q&A
- → Can I use white chocolate for coating instead of semi-sweet?
Absolutely! White chocolate offers a sweeter, creamier finish and pairs well with the red velvet flavors.
- → How should I store the truffles?
Keep them refrigerated in an airtight container. Serve chilled for a firm texture or slightly softened at room temperature.
- → Can I freeze these for later?
Yes, freeze the truffles on a lined tray, then transfer to a freezer-safe container. Thaw in the fridge before enjoying.
- → What decorations can I add on top?
Try sprinkles, chopped nuts, cocoa powder, or a drizzle of contrasting chocolate for visual and flavorful variety.
- → Is it possible to make these nut-free?
Certainly, just avoid adding chopped nuts or pick safe sprinkles for decoration. All other ingredients are nut-free.