
 Save
Save
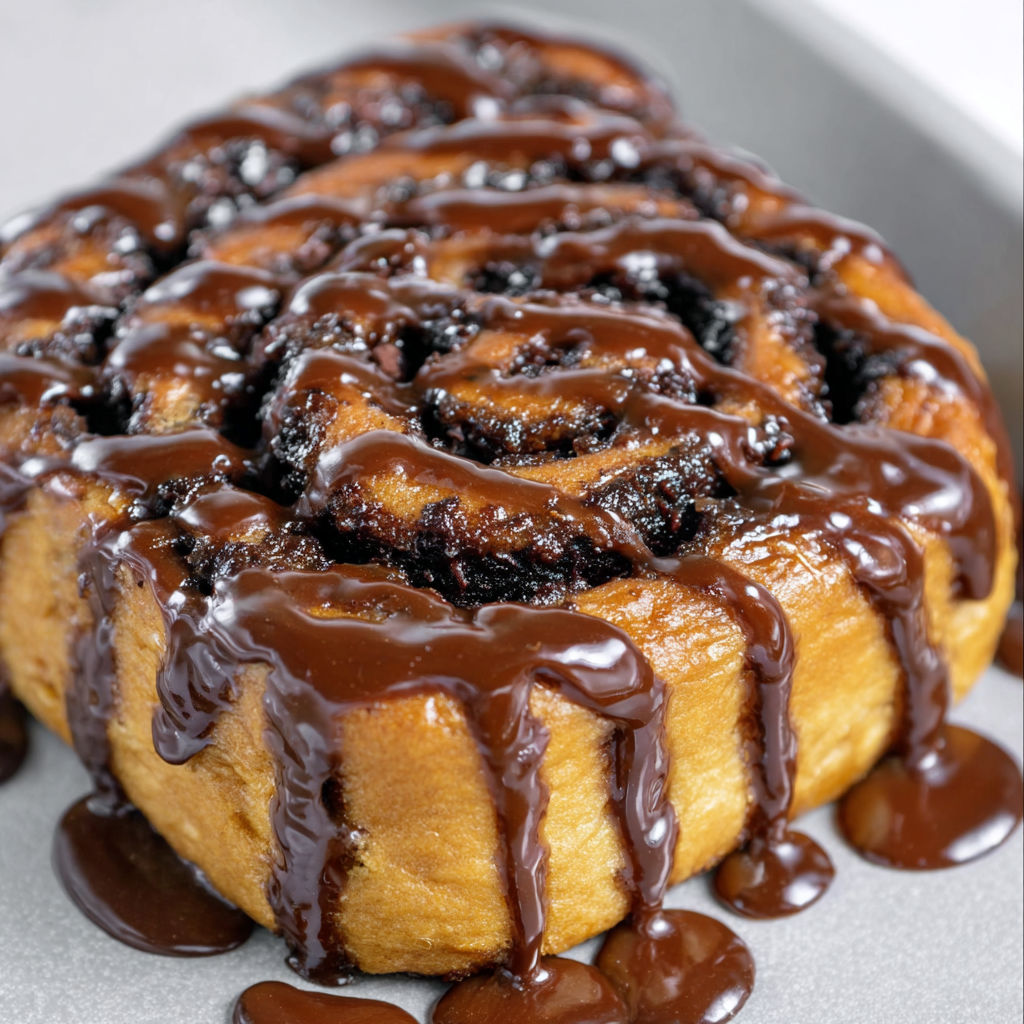
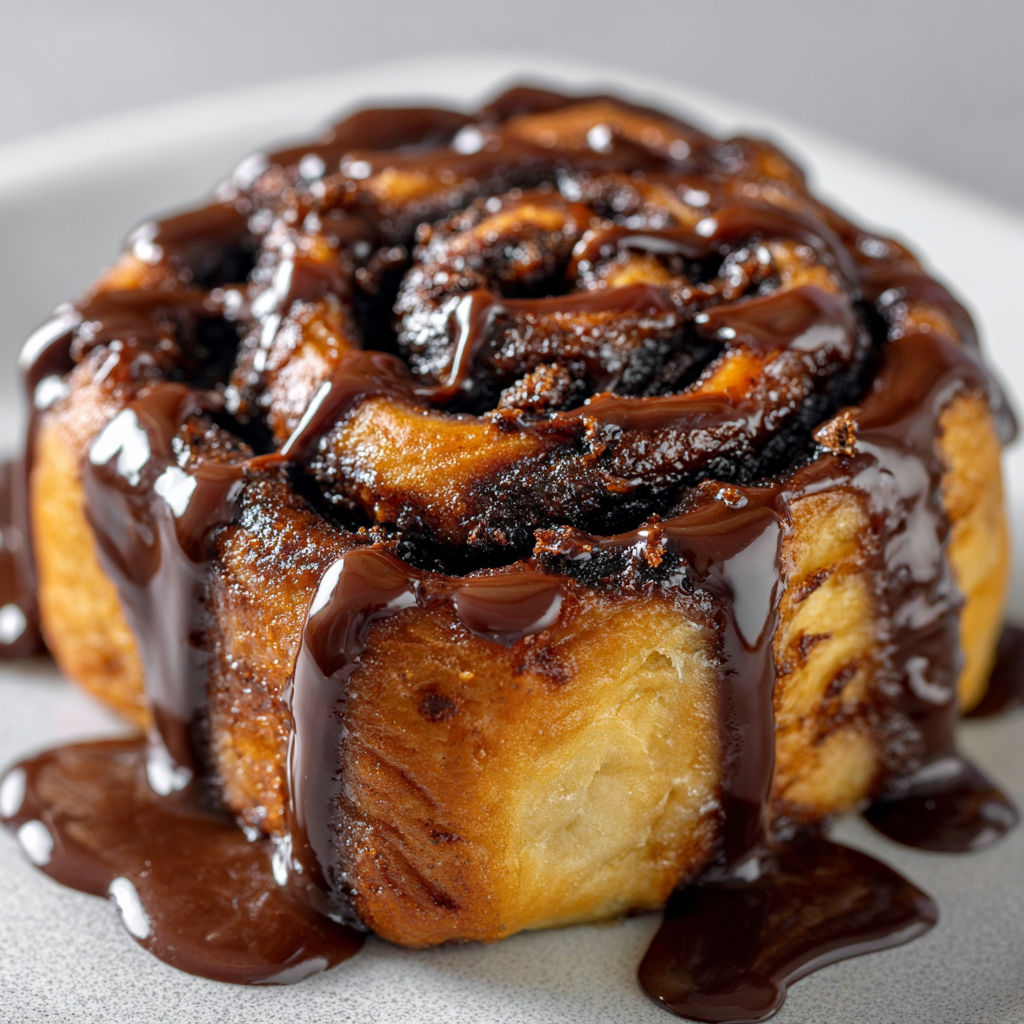
Warm, gooey, and swirled with cocoa in every layer, these chocolate cinnamon rolls are what every weekend morning should taste like. Instead of traditional cinnamon rolls, this recipe brings together deep chocolate dough, rich cocoa filling, and a velvety glaze for a bakery-level treat you can make at home.
When I first baked these rolls, my family gathered in the kitchen just to watch them rise. That chocolate scent is worth it alone, and now baking a batch has become our snow day tradition.
Ingredients
- All-purpose flour: Delivers classic fluffy roll structure; use unbleached for best texture
- Black cocoa powder: Brings bittersweet chocolate punch in the filling; Dutch-processed cocoa is a good backup
- Instant espresso: Deepens chocolate flavor without overpowering; use freshly ground or freeze-dried
- Milk chocolate chips: In the glaze for melt-in-your-mouth creaminess; choose high-quality chips that snap when broken
- Fresh yeast or instant dry yeast: Essential to guarantee a beautiful rise; always check freshness
Instructions
- Prepare the Filling:
- Combine brown sugar, black cocoa powder, and cinnamon in a medium bowl until evenly colored and fluffy. This ensures even chocolate flavor in every bite.
- Mix the Dry Dough Ingredients:
- In a large mixing bowl or stand mixer, add flour, sifted cocoa powder, instant yeast, salt, and espresso powder. Mix with a wooden spoon or dough hook so everything is evenly distributed.
- Warm and Combine Wet Ingredients:
- In a microwave-safe bowl, combine milk, granulated sugar, and butter. Heat until just warm to the touch but not hot. Stir until the butter melts to form a luscious base for the dough.
- Form the Dough:
- Slowly pour the milk mixture into the dry ingredients while mixing on medium speed. Once combined, add in the egg. Continue mixing until a slightly sticky dough forms that starts to pull away from the bowl.
- Develop the Dough Texture:
- Mix for two to three minutes on medium speed. As it comes together and becomes elastic, gradually add extra flour a tablespoon at a time. Check readiness by poking the dough. It should be tacky but not sticky and leave your finger clean.
- Let It Rest:
- Cover the bowl with plastic wrap or a damp towel and allow to rise for fifteen minutes. This relaxes the gluten so rolling will be much easier.
- Shape and Fill the Dough:
- Flour your work surface well and roll the dough into a large, even rectangle. Spread softened butter all over the dough, leaving a narrow border along one side for sealing. Sprinkle the chocolate cinnamon filling across the buttered area and gently press it in.
- Roll and Cut:
- Roll the dough tightly into a log starting at the covered edge. Use dental floss to cut into even pieces for tidy spirals. Arrange them in a greased baking pan with space between each roll.
- Final Rise:
- With the oven preheated and then turned off, cover the pan and place inside for thirty minutes. The warmth will help the rolls expand and become pillowy.
- Bake to Perfection:
- Remove the cover and bake in a hot oven until the rolls are puffed and the tops look shiny and set. The exact time will depend on your oven and how soft you like the inside.
- Make the Glaze:
- Whisk together butter, chocolate chips, and milk in a heatproof bowl and microwave until melted. Stir in powdered sugar and vanilla until glossy. Allow the rolls to cool slightly, then pour the glaze generously all over.
- Serve and Savor:
- Enjoy warm so the glaze melts into the rolls for the ultimate chocolate experience.
My favorite ingredient is the black cocoa because it reminds me of a midnight chocolate bar. When I first made these for my sister’s birthday, we could not stop laughing at the chocolate glaze drips as everyone tried to sneak a roll before dinner.
Storage and Leftover Tips
Keep rolls in a covered container at room temperature for up to two days, or refrigerate for longer softness. Warm individual rolls for a few seconds in the microwave to reactivate that bakery-fresh feel. You can also freeze both unbaked and baked rolls just be sure to wrap tightly and glaze after reheating for best texture.
Easy Ingredient Swaps
If you run out of black cocoa, plain Dutch-processed cocoa makes a solid backup. Try swapping espresso powder with finely ground coffee or even omitting for a more subtle note. Plant-based milk and vegan butter also work beautifully in both dough and glaze for dairy free needs.
Perfect Ways to Serve This
Pile the rolls onto a platter and let everyone tear in for a brunch crowd pleaser. Pair with ice cold milk or a creamy latte. For dessert, top each roll with a scoop of vanilla or coffee ice cream for an extra treat.

Nothing compares to the anticipation of pulling these rolls from the oven on a lazy morning. The sight and smells transport my whole house straight to a chocolate bakery.
Recipe Q&A
- → What type of cocoa powder works best?
Both black cocoa and unsweetened cocoa powder amplify the chocolate flavor. Use them for a rich, dark dough and filling.
- → Can I make the dough ahead of time?
Yes, you can prepare the dough, let it rise, and refrigerate overnight. Let it come to room temperature before rolling.
- → How do I ensure a soft and fluffy texture?
Allow the dough to rest and rise adequately. Mixing until elastic and not over-flouring is key for pillowy rolls.
- → What's the purpose of espresso in the dough?
Instant espresso or coffee deepens the chocolate flavor, making the rolls taste richer without overpowering sweetness.
- → How do I achieve a smooth chocolate glaze?
Gently melt chocolate chips with butter and milk, then whisk with powdered sugar and vanilla until creamy and pourable.