
 Save
Save
I've spent tons of time in my kitchen playing with cake pop ideas and now I'm super excited to share what really works. These cute little treats mix crumbled cake with smooth frosting, rolled into adorable balls and dunked in silky chocolate. My steps show you exactly how to whip these crowd-pleasers up, whether you're cooking for friends or just want something sweet for yourself.
The Wonder Inside These Tiny Treats
You'll totally love how flexible these goodies are. I've thrown them together with store-bought cake mix when I'm rushed and my grandma's secret recipe when I want to impress. The real magic starts when that fluffy cake blends with creamy frosting and gets wrapped in a thin, crunchy chocolate coating. Every bite feels like heaven.
Stuff You'll Want From Your Pantry
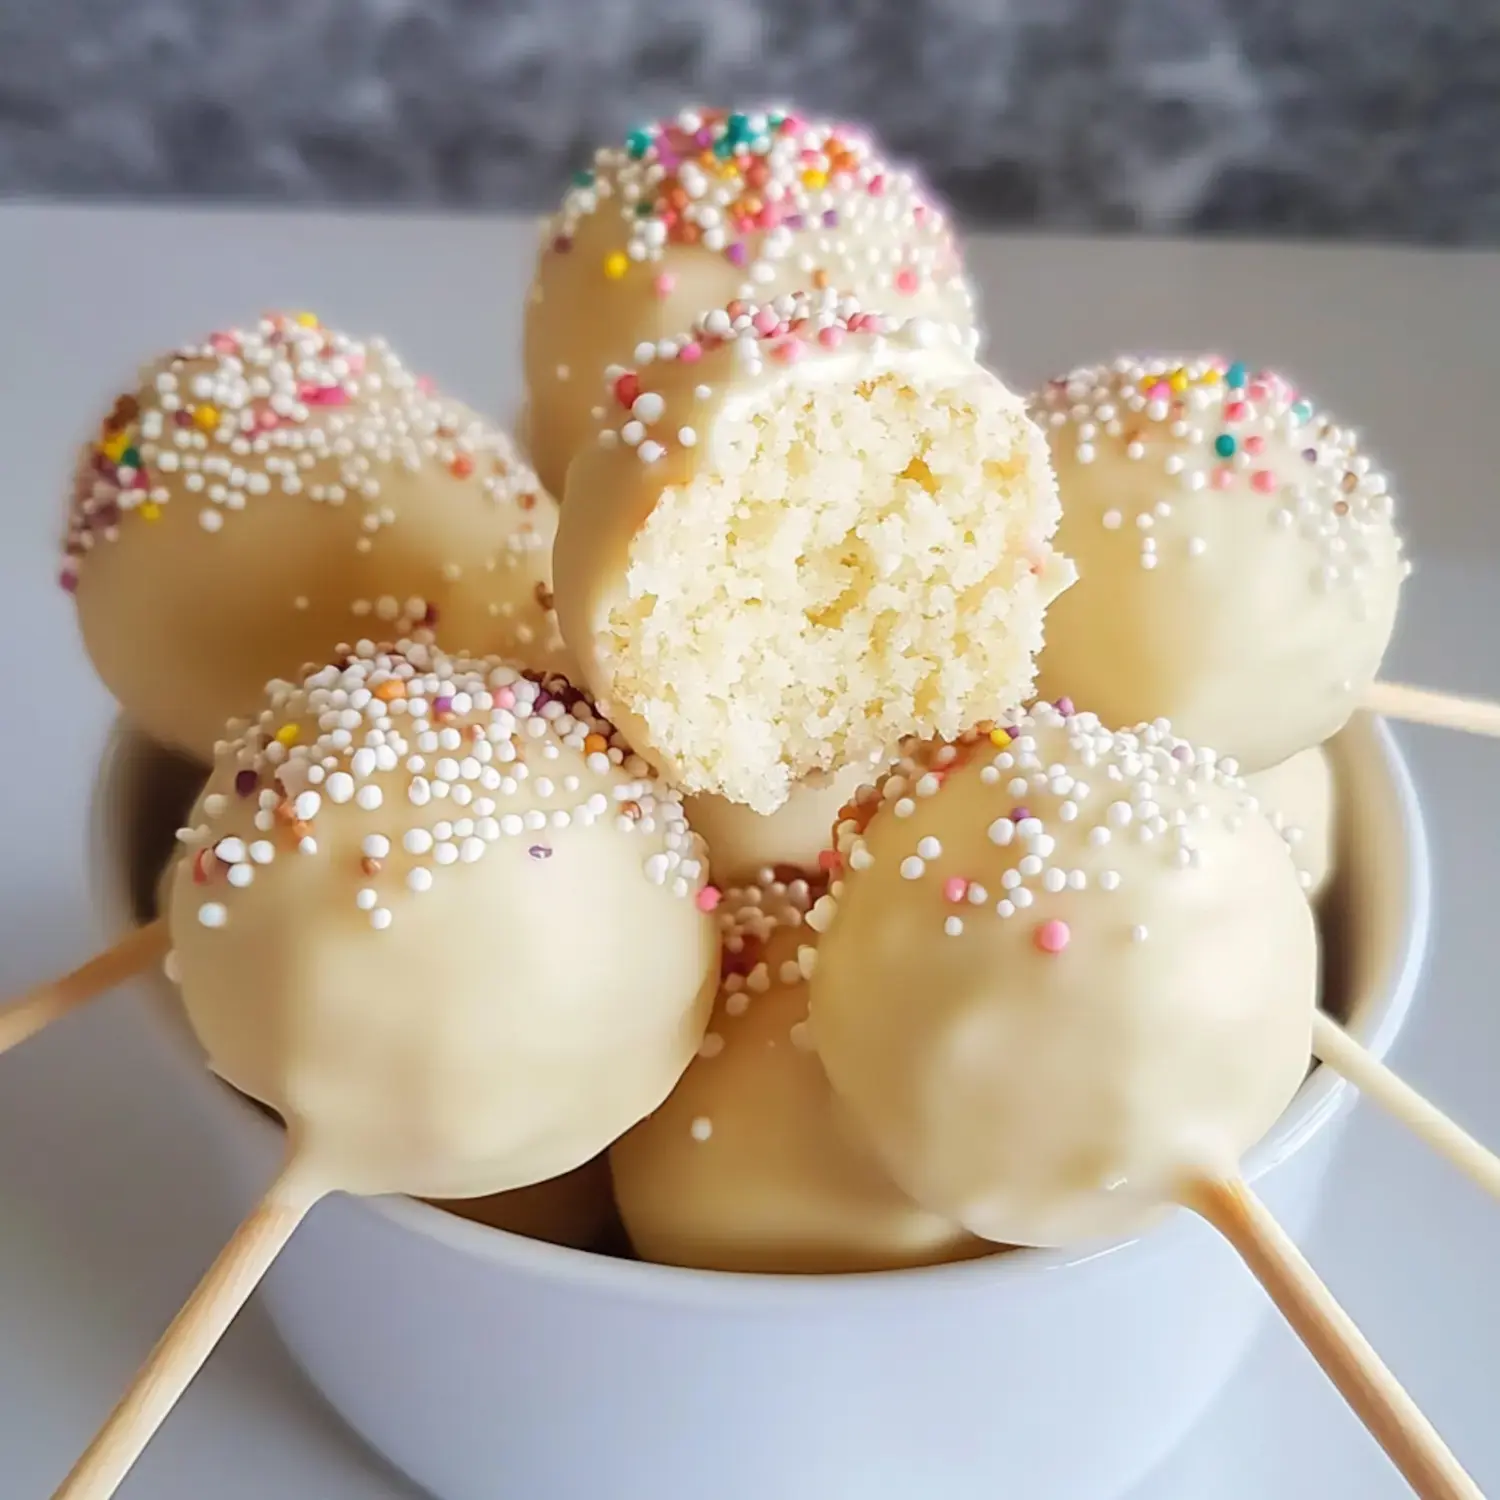
- Cake: Any vanilla cake you like works great here. I grab my go-to white cake recipe but honestly, boxed mix works in a pinch too.
- Frosting: My homemade buttercream can't be beaten - real butter, sugar powder and pure vanilla extract.
- Chocolate Melts: These are what I rely on for that awesome coating that hardens perfectly.
- Sprinkles: Whatever colors you fancy will make these pops uniquely yours.
- Vegetable Oil: A tiny bit helps regular chocolate flow better if you skip the candy melts.
- Cake Pop Sticks: Grab these at craft shops - you'll need them for the classic look.
Steps To Create Your Cake Pops
- Getting Started
- Make your cake and wait for it to cool all the way. Then break it into super tiny bits in your largest mixing bowl.
- The Mixing Stage
- Add most of your frosting bit by bit. Go slow since you can always put more in until it feels perfect.
- Creating Your Spheres
- Grab tablespoon portions and roll them in your hands. Stick them in the freezer for 10 minutes, then roll again for smoothness. Back to the freezer for 30 more minutes.
- Melting Chocolate
- Heat your chocolate with short microwave blasts, mixing well between each. A tall mug works wonderfully for dipping.
- Assembly Steps
- Stick your pop stick in melted chocolate, push into a cake ball, then dunk the whole thing. Tap gently to make the coating smooth.
- Decorating Now
- Put on sprinkles while chocolate stays wet, then stand them up in some styrofoam or a cup filled with uncooked rice.
My Top Baking Tips
What really works is starting with just a tiny bit of frosting. You can always add more but you can't fix overly wet cake pops. Keep that chocolate nice and warm while your cake balls stay cold. Let them stand up as they dry for that professional bakery finish.
Storing Your Sweet Creations
These little gems will stay yummy in a sealed container at room temperature for 3 days. Want them to last longer? Put them in your fridge for up to a week. Planning way ahead? You can freeze the bare cake balls for as long as 3 months.
Why These Stand Out
My approach gives you those dreamy cake pops with just the right moisture level and the glossiest coating. After you get these simple techniques down, you'll create treats that look like they came from a fancy shop. Nobody will believe you made them at home.
Customize Your Way
This is when you can really get creative. Sometimes I mix in a tiny bit of food color to match a birthday theme or fold in smashed Oreos for extra crunch. You can decorate them any way you want, from simple chocolate drizzles to fancy sparkly sugar.
Ways To Show Them Off
During my food service days, I learned how much display matters. Try setting your cake pops in a cute vase with bright tissue paper or place them in an old-fashioned teacup full of sugar. They look amazing wrapped in clear plastic with ribbons for giving as gifts.
Smart Shortcuts I Use
Don't rush when you're making those cake balls - rolling twice really helps get perfect rounds. If your chocolate starts thickening up, just warm it again quickly. I always work with a few at a time while keeping the rest cold so they stay firm for dipping.
Great For Any Party
Through the years I've brought these sweet bites to loads of birthday bashes, baby celebrations and wedding events. There's something about these tiny desserts that gets everyone smiling. After you make them once, you'll fall in love with how much joy they bring to gatherings.

Recipe Q&A
- → What's the point of extra oil in boxed cake mix?
- The extra oil gets you a juicier cake that sticks better with the icing when you're making the balls. This gives your cake pops a much nicer feel when eating.
- → Is there a reason to roll the cake balls twice?
- Cooling them first and rolling again lets you get super smooth, perfectly round shapes. Your cake pops will look fancy and the coating will go on evenly.
- → What makes candy melts better than normal chocolate?
- Candy melts harden fast and flow smoother when they're melted. Regular chocolate needs adding oil to thin it out and might not harden as nicely.
- → Can I prepare these beforehand?
- Sure thing, you can freeze the bare cake balls up to six weeks. After they're dipped in chocolate, they'll stay good in the fridge for about a week.
- → Why should I coat the sticks with chocolate first?
- The chocolate on the sticks works like glue once it hardens. This keeps your cake balls from falling off the sticks when you're eating them.