Stunning Black Velvet Cake

As seen in: Cakes & Cupcakes for Any Occasion: Sweet Celebrations Made Simple

I've finally cracked the code on this midnight chocolate cake that looks totally amazing! Turns out mixing standard cocoa with black cocoa creates that deep dark shade naturally. I worried it might turn out dry but combining butter with oil works wonders - it stays incredibly soft without feeling too dense. I threw in buttermilk because my grandma always claimed it improved cakes, and she wasn't wrong! It adds this wonderful flavor that isn't overly sweet. The layers stack beautifully while staying fluffy and tender. Guests always get excited when they see it because it's literally darker than midnight! Baked it for my buddy's Halloween bash and everyone kept snapping photos. It's great for any spooky gathering, or just when you want something completely different from your typical chocolate cake.
iamcooker.com
Refreshed on Thu, 03 Apr 2025 16:32:03 GMT
Black Velvet Cake Save it
Black Velvet Cake | iamcooker.com

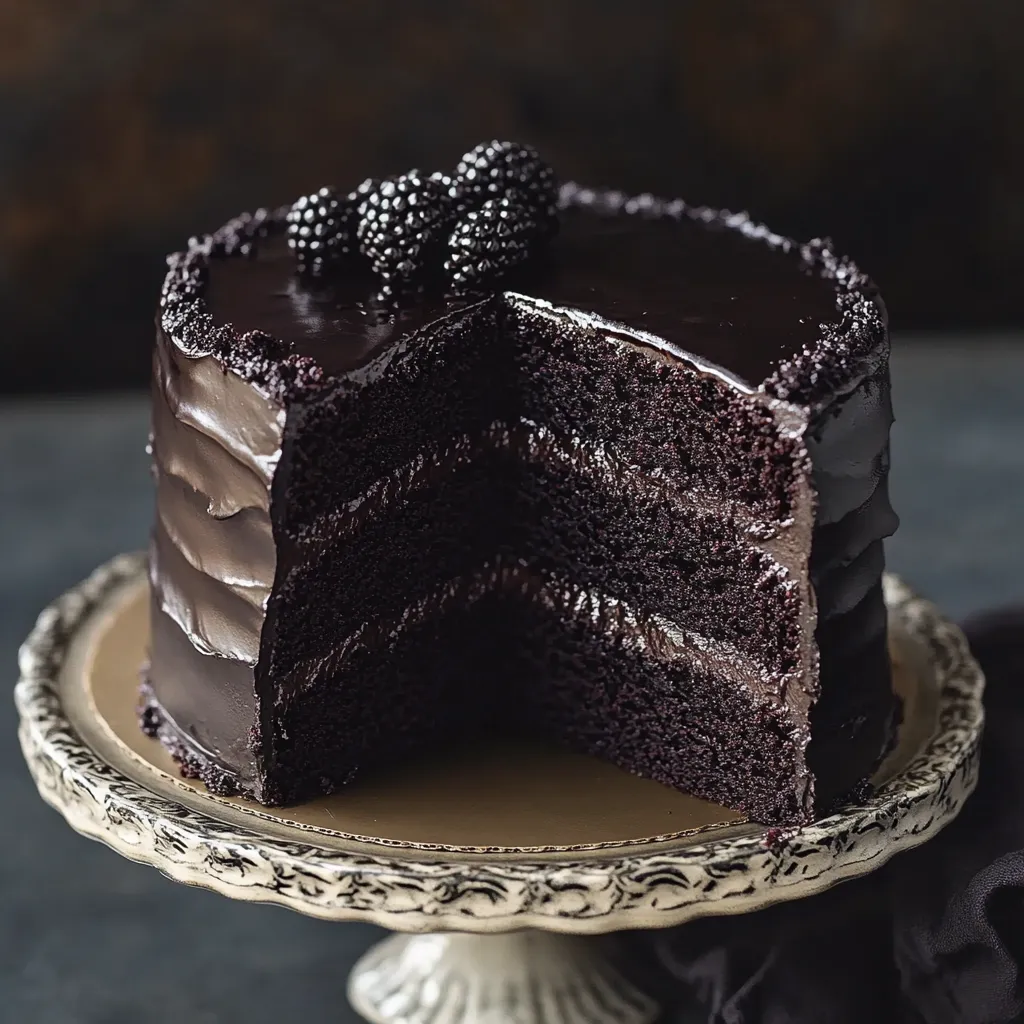
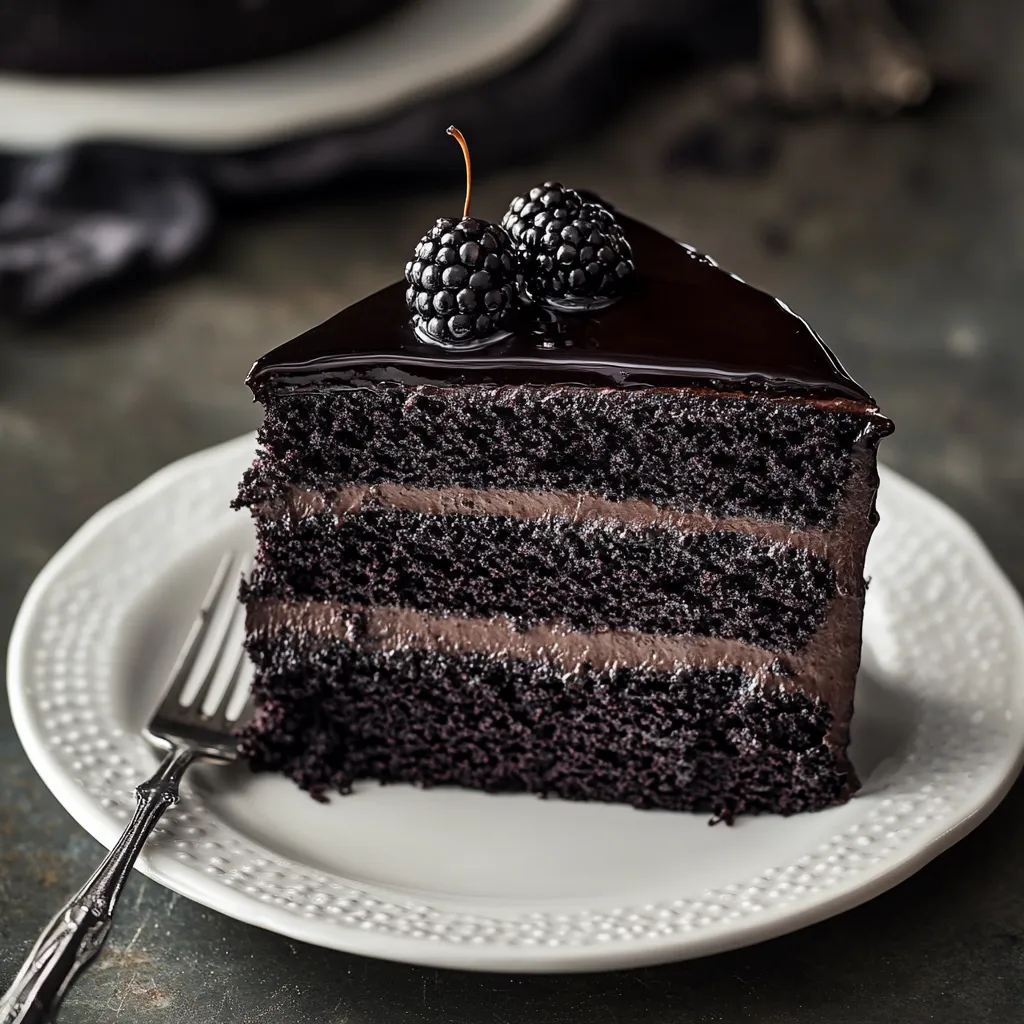
I'll show you how to turn a basic chocolate cake into a show-stopping Black Velvet creation. This eye-catching treat blends deep cocoa flavors with a stunning black color that's guaranteed to impress at fancy gatherings or when you're looking to make something unforgettable.

I've played around with so many different recipes, and I've found that mixing black cocoa with regular gives you the best color without messing up the flavor. The first time I brought this to a Halloween get-together, everyone couldn't believe how good it looked and tasted.

Key Ingredients and Smart Shopping Advice

  • Black Cocoa Powder: Go for Dutch-processed to get that intense darkness. Keep it sealed tight when not using.
  • Buttermilk: Don't skip the full-fat version for the richest results. Let it sit out before mixing.
  • Butter: Grab unsalted so you can control the saltiness yourself. Make sure it's properly softened.
  • Black Food Coloring: Stick with gel or paste types for deep color that won't thin your batter.
Black Velvet Cake Save it
Black Velvet Cake | iamcooker.com

Step-by-Step Baking Guide

Step 1: Getting the Butter-Sugar Mix Just Right
Keep beating until it's super fluffy and light. Don't forget to scrape down the sides often. You want it almost white and when you touch it, it shouldn't feel gritty at all.
Step 2: Handling the Dry Stuff Properly
Run the cocoas through a sifter to break up clumps. Add them bit by bit to avoid making a mess. Stop mixing as soon as everything comes together. Use gentle folding to keep all that air in there.
Step 3: Nailing That Deep Black Color
Put coloring in little by little to get exactly what you want. Stir well after each addition. Take a look in good lighting. Keep in mind it'll get a bit darker in the oven.

I came up with this while trying to improve on the classic red velvet. I wanted something just as dramatic but with a more grown-up vibe. Using two different cocoa types was the game-changer that made everything click.

Getting that perfect black shade while keeping the cake super moist took loads of tries to get right. Adding that touch of vinegar doesn't just help with color—it also makes the texture incredibly soft.

Black Velvet Cake Save it
Black Velvet Cake | iamcooker.com

This cake has become my go-to for all special events. I never get tired of watching people's faces when they see that first slice, and the deep, layered chocolate taste has everyone asking for seconds.

Common Questions

→ What is black cocoa powder?
It's super-Dutched cocoa that gives Oreos their blackness and unique taste.
→ Can I skip the food coloring?
Sure, the cake will still look incredibly dark from just the black cocoa.
→ Why use both butter and oil?
Butter brings flavor while oil keeps your cake soft for longer.
→ Can I make cupcakes instead?
Definitely, just bake at the same heat for about 18-20 minutes.
→ How do I store this cake?
Keep it covered at room temp for up to 3 days or in your fridge for a week.

Deep Black Velvet Cake

An impressive midnight-colored dessert created with black cocoa for deep chocolate taste and remarkable appearance.

Preparation
20 Mins
Cooking Duration
30 Mins
Complete Duration
50 Mins
By: sofia


Complexity: Moderate

Origin: American

Output: 10 Portions

Diet Types: Plant-Based (with dairy/eggs)

What You'll Need

→ Dry Goods

01 2 cups regular flour
02 1 cup white sugar
03 2 tablespoons dark black cocoa
04 1 tablespoon plain cocoa powder
05 1 teaspoon rising powder
06 1/2 teaspoon sodium bicarbonate
07 1/2 teaspoon table salt

→ Wet Stuff

08 1 cup tangy buttermilk
09 1/2 cup room temp unsalted butter
10 1/4 cup neutral cooking oil
11 2 large fresh eggs
12 1 tablespoon clear vinegar
13 1 teaspoon pure vanilla
14 Black food coloring in gel or paste form

Preparation Steps

01 Step

Warm your oven to 350°F. Get two 9-inch cake pans ready

02 Step

Whip the butter with sugar till light. Then mix in oil, eggs, vanilla, and the vinegar

03 Step

Pour in buttermilk and sifted dry goods bit by bit. Stir in the black coloring

04 Step

Pour the batter into both pans, then bake for about 25-30 minutes

05 Step

Let sit for 10 minutes in pans before moving to a rack to finish cooling

Additional Tips

  1. Want a darker cake? Just add more black coloring
  2. Tastes amazing with tangy cream cheese topping or fluffy chocolate ganache

Required Equipment

  • Pair of 9-inch round cake tins
  • Power mixer
  • Flour sifter
  • Metal cooling grid

Allergen Notice

Review ingredients for possible allergens and seek professional medical advice if uncertain.
  • Milk
  • Eggs
  • Wheat

Nutritional Information (Each Portion)

Consider these values as estimates rather than definitive health guidance.
  • Energy: 450
  • Fat Content: ~
  • Carbohydrates: ~
  • Protein Content: ~