
 Save
Save
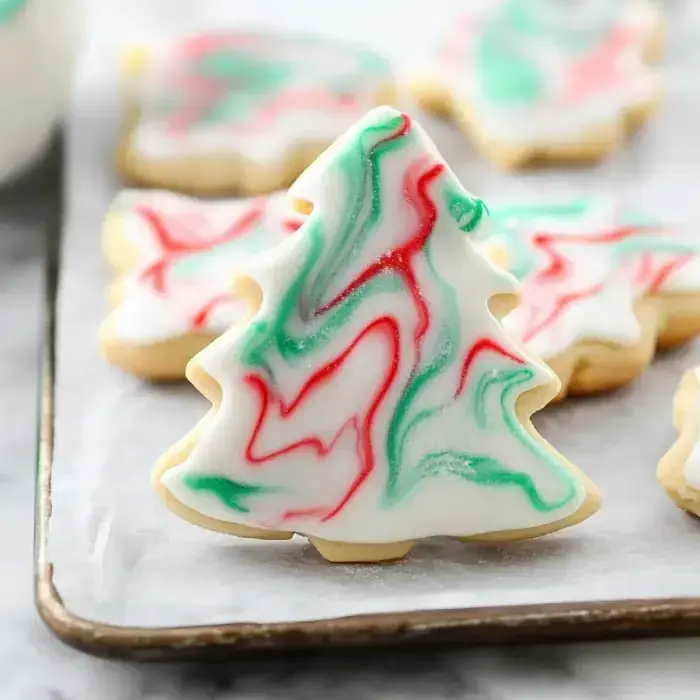
Gosh, I'm so excited to tell you about my go-to holiday treat! These Swirled Holiday Sugar Cookies have become my Christmas trademark. What makes them extra special? It's all in my secret dough that uses powdered sugar for an amazingly tender bite. Once you add those beautiful royal icing swirls on top, they transform into edible art. My bunch at home devours them every December, and I bet yours will too!
What Makes These Treats So Special
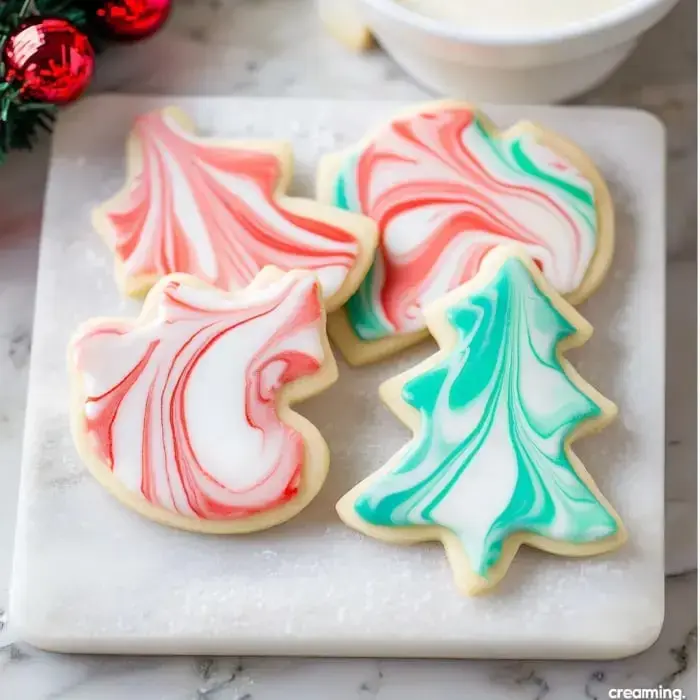
These cookies blend the yumminess of traditional sugar cookies with eye-catching marble designs. My little ones help swirl the patterns, making each cookie one-of-a-kind. The tender, buttery base plus the sweet royal icing creates that melt-in-your-mouth goodness we all want during the holidays. At cookie swaps, they're always grabbed first.
Your Shopping List
- Butter: Softened salted butter or plain butter with a pinch of salt.
- Powdered Sugar: Gives you a more delicate texture in the dough.
- Egg: Take it out early so it's not cold.
- Vanilla Extract: For that warm taste; bourbon vanilla works wonders.
- Flour: Regular all-purpose or natural unbleached works great.
- Baking Powder & Salt: Needed for proper rise and taste balance.
- Royal Icing: Whip it up with powdered sugar, meringue powder, water, and food coloring gels for those pretty swirls.
Cookie Making Steps
- Blend Your Wet Stuff
- Beat butter and powdered sugar till light and airy. Drop in the egg and vanilla, mixing thoroughly.
- Get Your Dry Items Ready
- Stir flour, baking powder, and salt together. Slowly add to your wet mixture.
- Cool Your Dough
- Shape into flat rounds, wrap in plastic, and stick in the fridge for half an hour.
- Shape Your Cookies
- Roll the cold dough about ¼ inch thick, cut shapes, and put them on lined cookie sheets.
- Pop In The Oven
- Cook at 350°F (175°C) for 9–15 minutes until you see light golden edges.
Crafting Those Gorgeous Swirls
Making those swirls is the best part and super easy too! I get my royal icing nice and smooth then split it between different bowls. Then I drop in gel colors and give a light stir. Don't mix too much or you'll lose those pretty swirls. Just dip each cooled cookie face down into your icing and let extra drip off. You'll get amazing patterns every single time.
Put Your Stamp On Them
I'm always trying new color mixes with these cookies. Red and green work great at Christmas, but I've done red and pink for Valentine's and soft colors for Easter too. Sometimes I mix in a dash of almond or even caramel flavoring for something different. A little sprinkle of sugar or tiny silver balls on wet icing adds such nice sparkle.
Storing Your Batch
These pretty cookies stay good in a sealed container on your counter for about 4 days. Stick them in your fridge and they'll keep a whole week, though the icing might get a bit tacky. I often freeze extra dough for surprise visitors. Just don't forget to put wax paper between cookie layers so they won't stick.
Going Gluten Free
My sis can't have gluten so I've worked out a special version just for her. The key is grabbing a really good gluten free flour mix. I sometimes throw in some almond flour too for extra flavor. Just make sure all your stuff is certified gluten free and follow along like normal. They turn out just as tasty.
Gifts From The Heart
These cookies make the cutest Christmas presents. I love tucking them in festive tins with parchment between layers. The look on people's faces when they see those beautiful swirled designs is priceless. They're great for giving to teachers, bringing to cookie parties, or dropping off to neighbors during the holiday season.
Recipe Q&A
- → What's the benefit of confectioners' sugar in the recipe?
- Confectioners' sugar gives you softer, more delicate cookies and stops them from spreading while they bake. If you're baking at high altitude, you'll want to use a bit less.
- → How can I tell if my royal icing is just right?
- When you lift the icing, it should flow down and smooth itself out within 5-8 seconds. Too thick? Add water drops. Too runny? Mix in more confectioners' sugar.
- → How long will these cookies stay fresh?
- After the icing fully dries, you can store them for up to a week in a sealed container at room temp. Don't forget to put wax or parchment paper between layers.
- → Why do I need to cool the dough?
- Cooling for half an hour helps the cookies keep their shape during baking and makes the dough way easier to work with when you're cutting out your designs.
- → Can I make these if I live in the mountains?
- You sure can. Just add 2 extra tablespoons of flour, cut back on the confectioners' sugar, add a splash of water if things look dry, and follow mountain baking times.