
 Save
Save
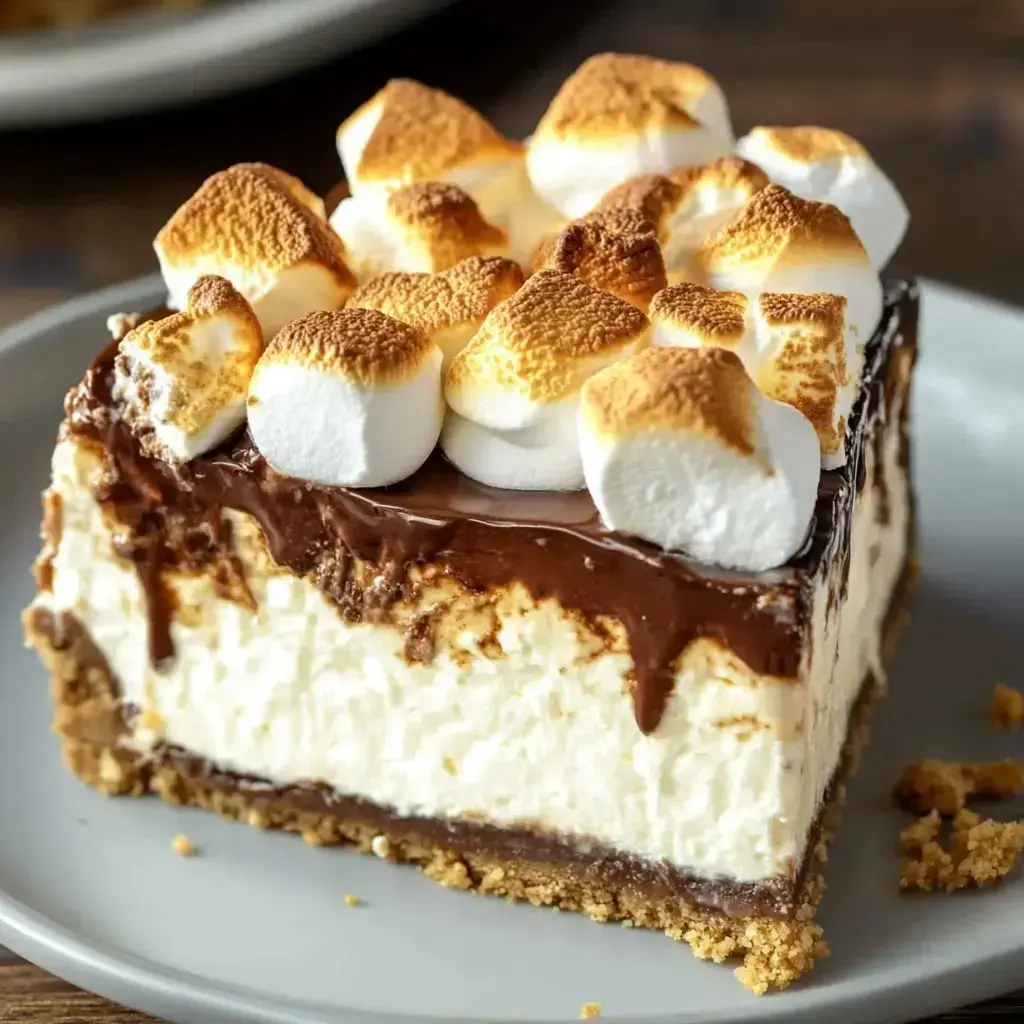
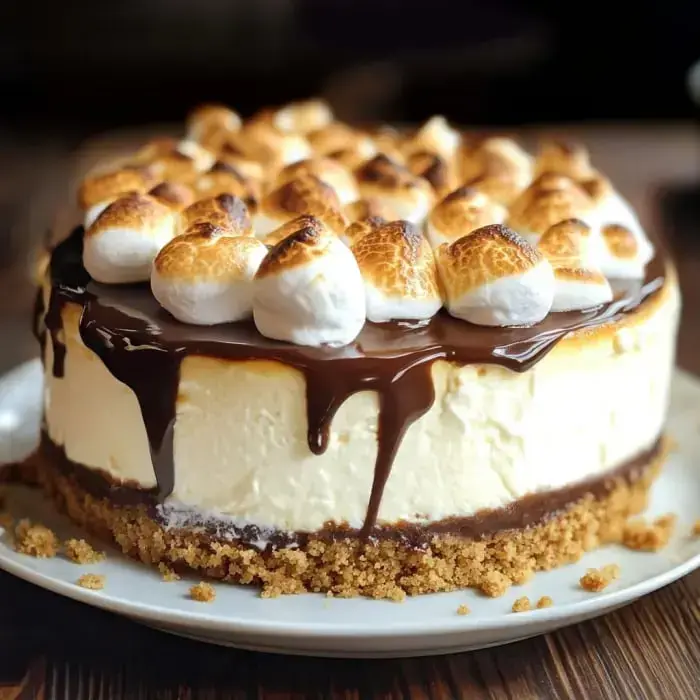
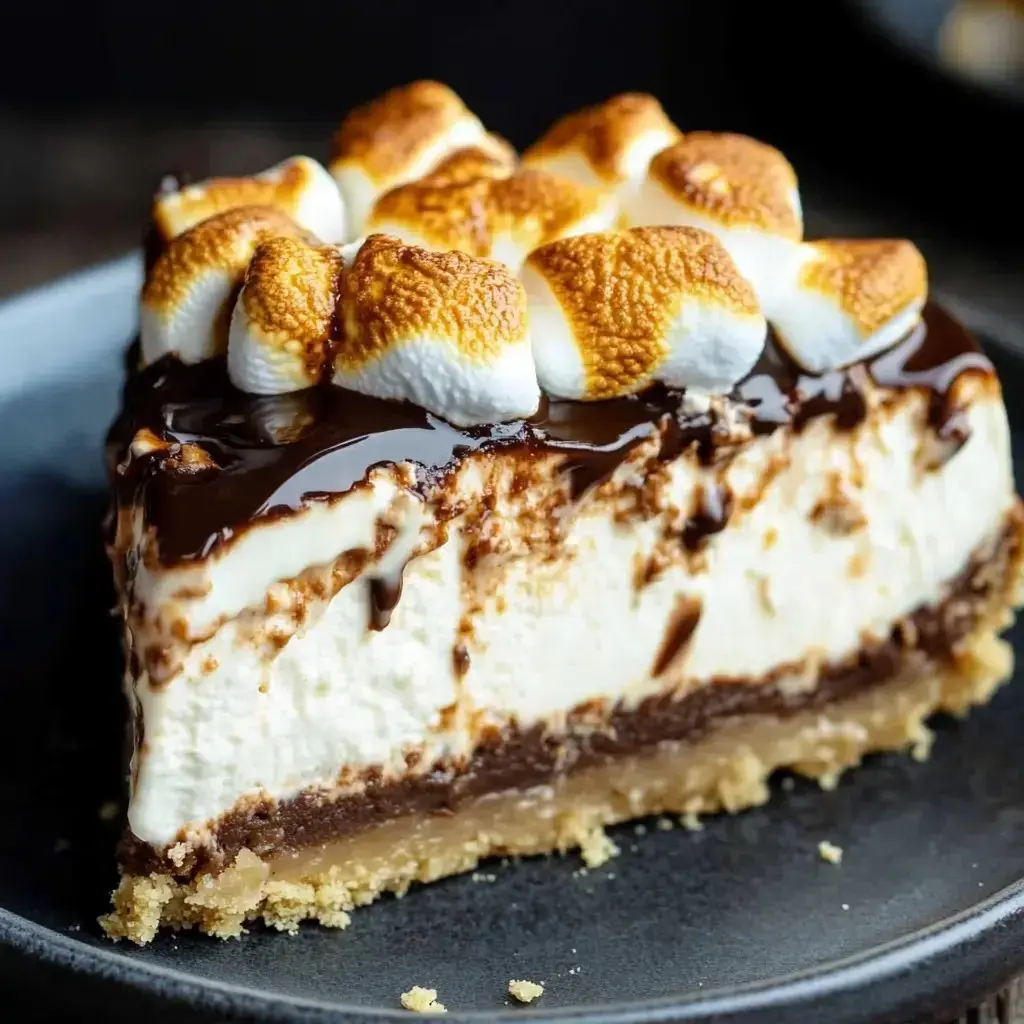
Dreamy S'mores Cheesecake
I'm seriously pumped to tell you all about this. My version of S'mores Cheesecake mixes all those gooey campfire flavors into one crazy smooth creamy treat. Imagine a graham cracker base that's super buttery, a rich filling that's so silky, then all dressed up with warm chocolate and melty marshmallows on top. It looks impressive but honestly, anyone can pull it off. No fuss.
Why You’ll Totally Love This
This is like your childhood favorite but all grown up and way fancier. Each bite gives you oozy marshmallow, chocolate, and that thick creamy center. I always bring this baby to backyard parties and people are wowed. Secret? It comes together easier than it looks.
Stuff You’ll Need
- Crust Magic: Graham cracker bits (store-bought crumbs or go wild and smash your own).
- Buttery Goodness: Melted butter gives your base that rich taste.
- Tasty Boost: Vanilla extract for a nice flavor pop.
- Sweet Fun: Mini marshmallows (because it’s not s’mores without marshmallows).
- Chocolate Fix: Semi-sweet chocolate chips—the more, the better.
- Super Creamy: Full-fat cream cheese (soften it first, trust me).
- Sugar Time: Plain white sugar for that sweet factor.
- Secret Ingredient: Cornstarch so your filling stays extra smooth.
- Hold It Together: Eggs to set everything just right.
- Rich & Lush: Heavy cream makes it dreamy and thick.
- Topping Joy: Warm up some fudge sauce to go all out at the end.
How We Pull This Off
- Starting With The Crust
- Turn your oven up to 325°F, coat your pan with some grease, then mash up those graham crackers with brown sugar, vanilla, and melted butter. Squish it into the pan, getting up those sides.
- S'mores Treat Layer
- Scatter plenty of chocolate chips and a handful of marshmallows on top of your base.
- Add The Cheesecake
- Mix the cream cheese 'til it's extra creamy, throw in everything else and blend until smooth, then pour it on your crust.
- Into A Water Bath
- Set your pan inside a bigger dish, fill that outer one halfway with hot water, bake everything for about 90 minutes. Let it hang out in the warm oven before moving it to cool off on the counter.
- Time To Chill
- Pop it into the fridge for at least another hour to firm up right.
- Decorate Your Masterpiece
- Lather on fudge sauce and pile mini marshmallows all over.
- Give It Some Color
- Give those marshmallows a quick blast under the broiler for toastiness, then let the whole thing set in the fridge for 4 more hours.
Tips For Total Win
Let your cream cheese come to room temp first or you’ll get lumps. Don’t whip the batter too long, we want it velvety, not puffy. Wrap your pan snug with foil before it gets cozy in a water bath—nobody wants a soggy base. Watch the marshmallows when you broil, they go from golden to burnt real quick.
How To Keep It Tasty
Slip this in the fridge covered tight and it'll stay perfect for up to five days. Freezing it? No problem—just do it without the toppings, seal it up, and it'll last three months easy. When you're ready to serve, thaw overnight then hit it with marshmallows and chocolate.
Make Yours Stand Out
If you’re feeling fancy, pour over more warm fudge or add a big dollop of whipped cream right before serving. I dig this with a mug of hot chocolate, but iced milk or coffee is awesome too. Great for birthdays, BBQs, or whenever you want to cheer someone up.
Recipe Q&A
- → What’s the point of using a water bath?
Baking it in a water bath keeps things smooth and stops cracks by holding in the moisture. That makes for a creamy cheesecake that’s just right.
- → How do I make sure water doesn’t sneak into my springform pan?
Really hug the outside of your pan with some heavy foil, pulling it up the sides. For extra safety, double up with another layer.
- → How can I tell my cheesecake’s baked through?
The outside should look set, but you still want a bit of jiggle in the center. Skip the knife—using one might mess up your cake. It'll stay firm as it cools down.
- → Is it cool to prep this ahead?
Totally! You can get it ready two or even three days before, just save the fudge drizzle and marshmallow toasting for the last minute to keep it looking sharp.
- → Why do I need to let it cool in stages?
Cooling it slowly keeps the texture silky and helps dodge those cracks. Don’t shove it straight in the fridge or you risk messing it up.