
 Save
Save
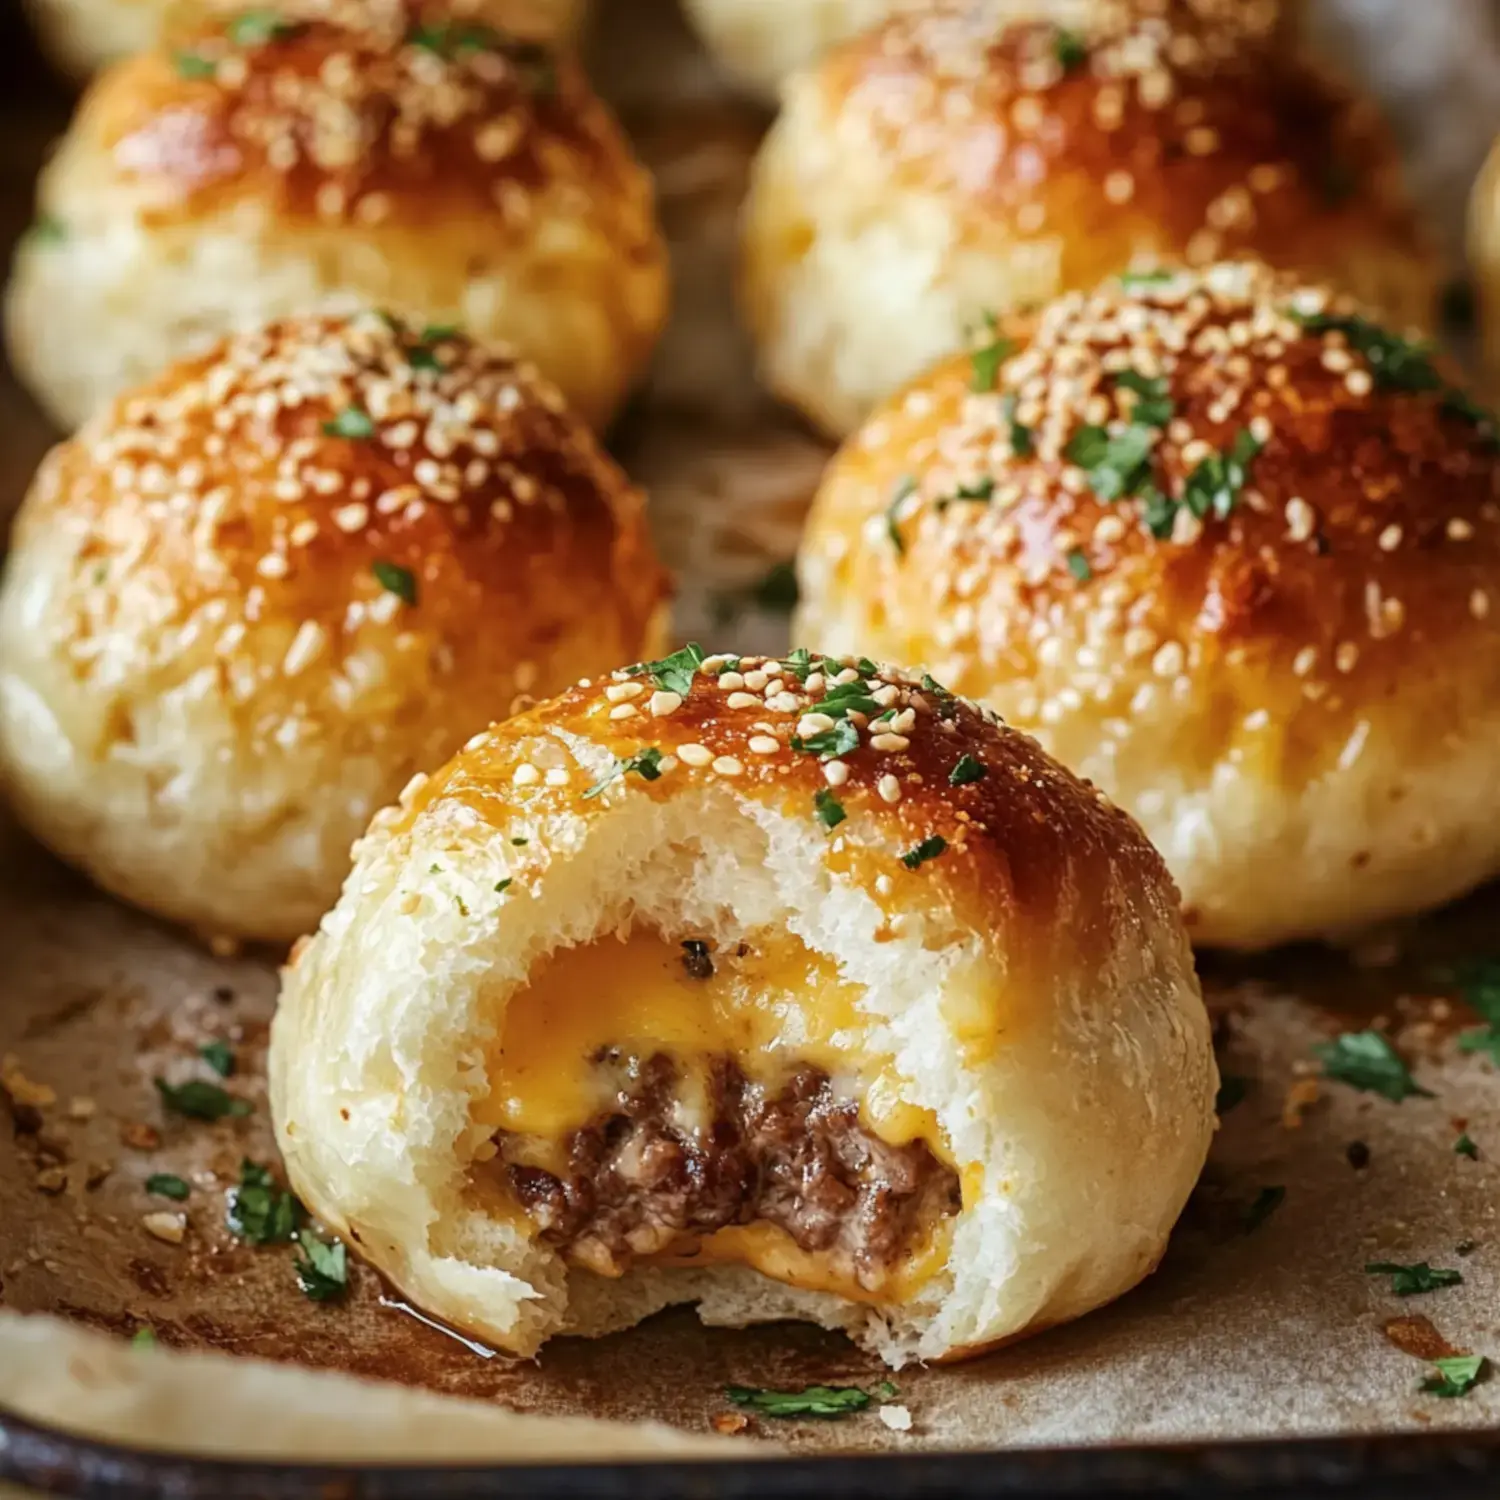
Gotta spill the beans about my crowd-pleasing party hit—Bacon Cheddar Garlic Burger Bombs! Whipped these up during last year's game gathering, and now my buddies can't get enough. It's all the tastiness of a juicy burger tucked inside garlicky, golden dough! Can't believe how popular they've become—friends literally camp around the kitchen waiting for the next batch to cool enough to grab.
The Secret Behind Their Wow Factor
You know what's awesome? When everyone thinks you slaved away for hours but you didn't! The magic happens when crispy bacon meets melted cheese inside that garlic parm outer shell. They work for any occasion too—from watching the big game to throwing together a fun dinner when the kiddos want something different than the usual!
Stuff You'll Need
- Ground Beef: Grab the 80/20 mix for extra juiciness!
- Bacon: Don't leave it floppy—cook it until it snaps.
- Cheese: Sharp cheddar rocks, but pick whatever melts your heart.
- Garlic: We're going all in with both minced and powder versions.
- Biscuit Dough: This stuff makes wrapping everything up so easy.
- Parmesan: Splurge on fresh-grated, not the container stuff.
- Butter: Because garlic butter makes everything taste better!
Let's Work Some Kitchen Magic
- Sizzle That Bacon
- Get your bacon super crunchy first and keep that tasty grease around—it's gonna take our flavor through the roof!
- Create The Foundation
- Cooking those onions and garlic bits in bacon fat will make your kitchen smell incredible.
- Mix The Filling
- Throwing together all those burger components creates this amazing mixture that's better than a regular patty.
- Bundle Them Up
- This part's actually fun—you're basically making little treasure pouches filled with meaty goodness.
- Slather With Flavor
- Go crazy with that garlic butter—put more than you think is right!
- Baking Time
- The wait is torture while they turn all golden and your house fills with smells that'll drive everyone nuts.
Smart Tricks I've Learned
I've made these so many times now and picked up some handy tricks! Don't stuff them too full even though you'll want to. Make sure you really seal those edges tight—cleaning melted cheese off oven racks isn't fun at all! And when it comes to that garlic butter topping, be super generous cause that's what gives you that amazing crust everyone fights over.
Showing Them Off
We always set up different dips around these babies—ranch, BBQ sauce, and plain ketchup work great. At parties I arrange them on a wooden platter with little sauce cups and it looks amazing without much effort! A sprinkle of chopped parsley on top makes them pop in photos too.
Storage Tricks
On the rare chance you've got some left, they'll stay good in your fridge for a couple days. Just warm them back up in the oven to get that nice crunch again. I often double the batch and freeze half before baking—they're such lifesavers when unexpected visitors drop by!
Shake Things Up
You can switch these up so many ways! Sometimes I swap in ground turkey for something lighter, or toss in diced jalapeños for a kick. My friend makes an awesome veggie version with plant-based meat that's surprisingly tasty! Just think about what you'd put on your dream burger and stuff it inside.

Recipe Q&A
- → Can I make these ahead of time?
You can fix the filling beforehand and keep it in the fridge. For the best results, put them together and bake right before you'll serve them. You can warm up already baked bombs in the oven later.
- → What type of dough works best?
Both chilled biscuit and crescent roll dough do the trick. The biscuit dough gives you a more bread-like feel while crescent dough turns out flakier.
- → How do I prevent the cheese from leaking?
Make sure you pinch the dough edges fully shut. Put the cheese right in the middle of your filling instead of close to the dough edges.
- → Can I freeze these?
You bet. Just freeze them after they've baked and cooled down. Wrap each one by itself and they'll keep for up to 3 months. Heat them straight from frozen until they're hot throughout.
- → What dipping sauces work well?
Ketchup, ranch, BBQ sauce or garlic aioli all go great with these. Mix some mayo and mustard for that classic burger sauce feel.