
 Save
Save
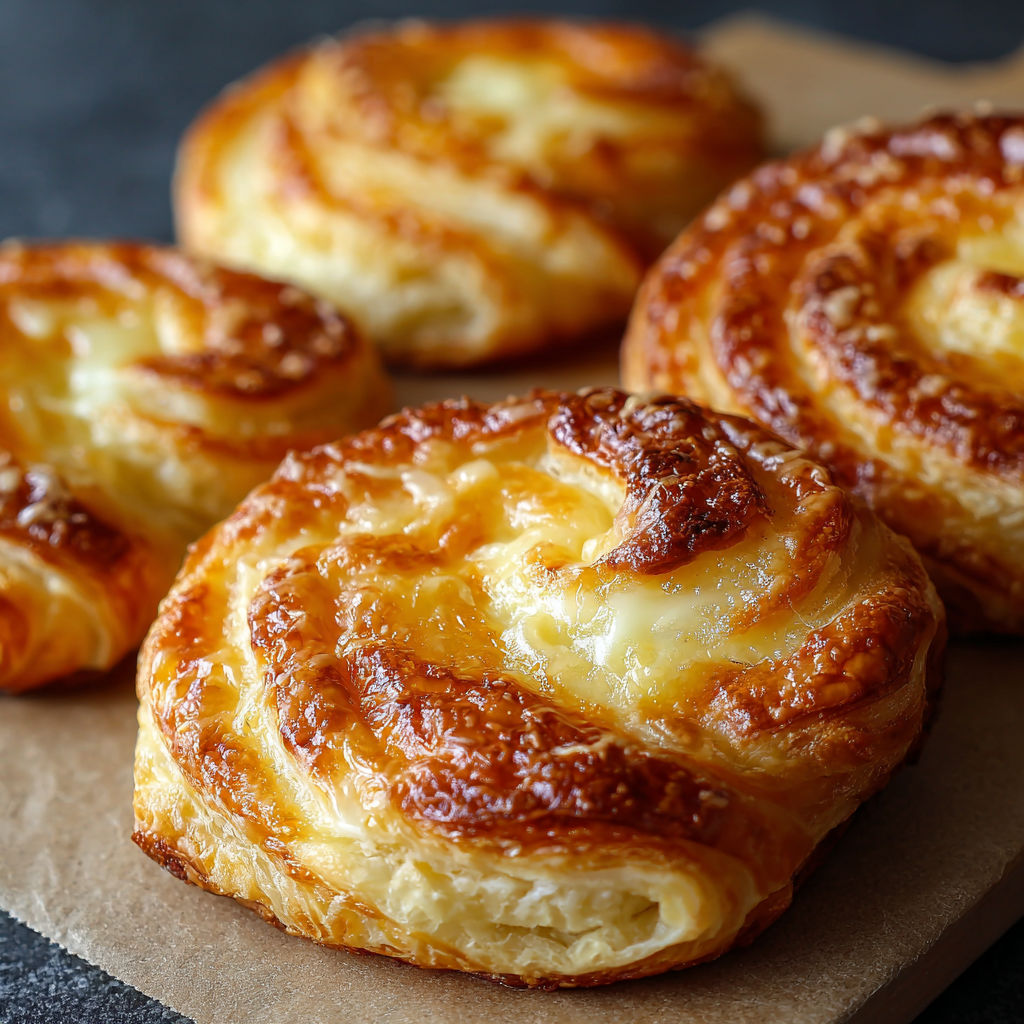
Buttery crescent cheese danishes are a little breakfast luxury I pull out when we need something special without making a fuss. They are pillowy soft with a creamy vanilla filling and always disappear fast whether I make them for weekend brunch or last minute when friends drop by.
I threw this together the first time when we had unexpected company and it was such a hit these danishes became our family’s go to for cozy mornings and celebratory breakfasts alike.
Ingredients
- Crescent roll dough: Brings that signature buttery layered texture use a good quality canned brand that is fresh and has a tender feel
- Cream cheese: Gives the filling its rich creamy base pick a brick style for best results avoid whipped
- Granulated sugar: Adds just the right touch of sweetness use superfine if you want your filling ultra smooth
- Vanilla extract: Infuses the filling with that irresistible warm notes go for pure vanilla over imitation if you can
- Egg yolk: Makes the filling silkier and helps bind it totally optional but luxurious
- All purpose flour: Keeps the dough from sticking while rolling and shaping use just enough to dust the surface
- Powdered sugar: Adds the bakery look and a light finish sieve it over the top after baking
- Fresh fruit or preserves: For a touch of color and brightness choose ripe berries or a favorite high quality jam
Instructions
- Mix the Cheese Filling:
- In a medium bowl mash the softened cream cheese with sugar vanilla extract and egg yolk if you’re using it. Stir until absolutely smooth and no streaks remain. The filling should be creamy and easy to spread.
- Prepare the Dough:
- Lightly dust your work surface with flour. Unroll the canned crescent dough. Pinch and press any perforated seams together so you have one large sheet with no gaps. Flip it over once or twice to ensure it is not overly sticky.
- Shape and Fill:
- Cut the dough into triangles or squares as you prefer. Spoon about one or two tablespoons of the cream cheese filling directly into the center of each dough piece. Use the back of your spoon to spread but do not overfill or it will spill out during baking.
- Seal the Edges:
- Gently fold the dough over itself covering the filling. Press or pinch along the edges firmly so it seals and the filling does not leak. If you like a tidier look tuck the corners under slightly for a bakery style shape.
- Bake to Golden:
- Arrange the shaped danishes on a parchment lined baking sheet with space between them. Slide the sheet onto the middle oven rack and bake at three seventy five degrees for twelve to fifteen minutes. Peek at the seven or eight minute mark to rotate if your oven runs hot in one spot. They are done when golden brown and puffy.
- Finish and Serve:
- Let the danishes cool on the tray just long enough so you can handle them but they are still slightly warm. Dust with powdered sugar for a classic finish or add a spoonful of fresh fruit or fruit preserves to the top. Serve warm for the ultimate treat but they are still delicious at room temperature.
I always look forward to swirling in just a hint of real vanilla in the filling. It reminds me of helping my grandma fuss over her Sunday pastries where she swore good vanilla was the start of every memorable bake. That simple kitchen memory lives on in every batch.
Storage and Leftover Tips
Once cooled completely store danishes in an airtight container at room temperature for up to two days. For longer storage move them to the fridge where they stay fresh for about four days. If you want to enjoy leftovers warm just pop one in the toaster oven or microwave for ten seconds.
Easy Ingredient Swaps
Not a fan of plain cheese Go ahead and stir a spoonful of lemon zest or orange zest into the cream cheese mixture for a zippy flavor. Swap in almond extract instead of vanilla if you love that classic bakery nutty aroma. If cream cheese is not your favorite try blended ricotta for a lighter texture.
Perfect Ways to Serve This
These danishes make a dreamy match for a mug of strong coffee or hot tea. For brunch serve with fresh fruit a dollop of whipped cream or a selection of jams so everyone can customize their treat. Leftovers are perfectly nice as a midday snack or dessert.
The Story Behind This Recipe
This recipe grew out of a need for quick comfort and family togetherness often when the weather was cold or someone needed a pick me up. The flaky dough with generous cream cheese filling immediately brings everyone to the kitchen island with plates in hand often before they have finished cooling.
Adapting for Every Season
Brighten up your danishes with fresh berries in spring and summer. For fall and winter swap the fruit topping for spiced preserves or a sprinkle of cinnamon sugar before baking. Around the holidays we sometimes add dried cranberries or a bit of citrus peel for festive flair.

These danishes are as perfect for a holiday breakfast as a spontaneous treat. Everyone who tries them is amazed how quickly bakery level pastries appear at the table.
Recipe Q&A
- → Can I use low-fat cream cheese?
Yes, low-fat cream cheese can be substituted for a lighter texture, though the filling may be less rich.
- → How do I keep the filling from leaking?
Firmly pinch the dough edges to seal before baking. Baking on parchment also helps with easy removal.
- → What fruit toppings work best?
Fresh berries, sliced peaches, or fruit preserves add brightness and complement the creamy filling well.
- → Can these be made ahead?
Yes, assemble and chill the pastries overnight, then bake fresh in the morning for best flavor and texture.
- → How should leftovers be stored?
Cool completely, then keep in an airtight container in the fridge for up to three days. Warm before serving.