
 Save
Save
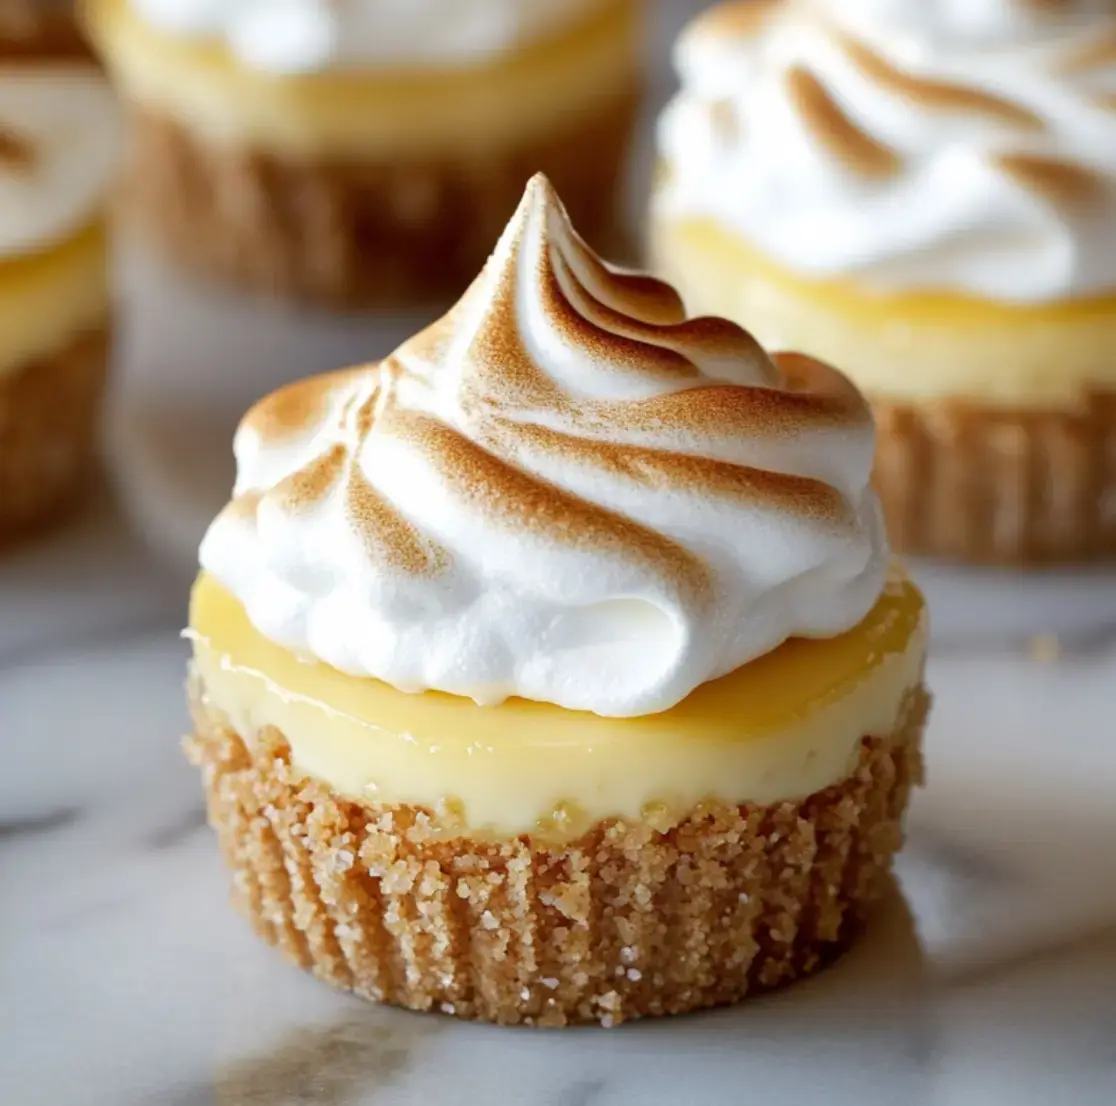
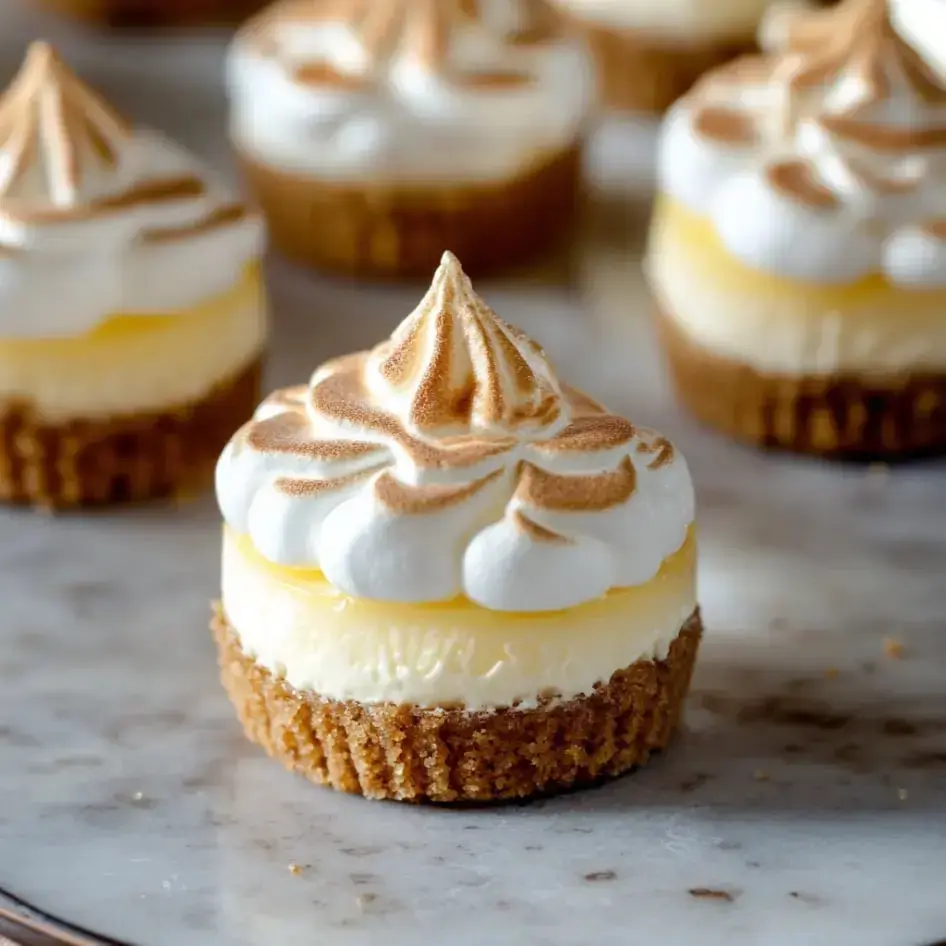
Tiny Zesty Lemon Meringue Cheesecake Bites
I whipped up these adorable treats for my kid's backyard celebration, and now they've turned into our go-to family dessert. The mix of zingy lemon cheesecake, fluffy meringue and crumbly graham base makes something truly wonderful with each mouthful. They're just the right size for parties and look stunning when arranged on any dessert platter.
A Dazzling Dessert Everyone Loves
What makes these mini cheesecakes so fantastic is how the flavors and textures work together. The smooth lemon mixture complements the crunchy base while the airy meringue tops it all off with such charm. I'm crazy about how they add brightness to any get-together, from morning brunches to evening cookouts.
What You'll Need
- Graham Crackers: They create our tasty crumbly foundation.
- Cream Cheese: Use the full-fat kind left out to soften for best results.
- Sour Cream: This gives a wonderful depth of flavor.
- Lemon Juice and Zest: Go with real lemons for the best taste.
- Granulated Sugar: Needed to sweeten both components.
- Eggs: You'll use whole ones for the filling and just whites for the topping.
- Cream of Tartar: The trick for stable, perfect meringue.
Steps to Make Them
- Start With The Base:
- Combine graham crumbs with melted butter and push into paper-lined muffin pans.
- Craft The Filling:
- Whip cream cheese until smooth then mix in sugar, zest and remaining ingredients.
- Cook Them:
- Pour mixture into crusts and bake until barely set, then cool and refrigerate.
- Whip Up Meringue:
- Heat egg whites with sugar then beat until they form shiny peaks.
- Put It All Together:
- Spread meringue on each chilled cheesecake and brown until golden.
Helpful Baking Tips
Don't forget to let your ingredients warm up to room temp for the creamiest filling. Mix in eggs at the end and don't overmix. Your cheesecakes should still wobble a bit in the middle when done. Make sure they're totally cold before topping with meringue, it really matters.
Storage Tips
These cute desserts will stay good in your fridge for around three days. Want to prep ahead? Skip the meringue part and pop them in the freezer for up to two months. Just let them thaw in the fridge overnight and add fresh meringue right before you serve them.
Quick Answers To Your Questions
- When are they ready: They're done when the edges are firm but the center still jiggles a bit.
- Getting that creamy texture: Warm ingredients and careful mixing are crucial.
- Don't have a torch: Your oven's broiler can work too, but watch them carefully.
Recipe Q&A
- → Can I prep them ahead?
Absolutely! You can bake the cheesecake layers up to 3 days before and store them in the fridge in a sealed container. Add the meringue right before serving for the freshest texture and presentation, and toast it on the spot.
- → Why should the center jiggle when baked?
A little wobble in the middle signals perfect doneness. As they cool, the internal heat finishes cooking them gently. This avoids cracking and keeps them soft and creamy.
- → Can I freeze these treats?
Yes, the cheesecake layer freezes well for up to 3 months. Wrap them tightly and use airtight containers. Don't freeze the meringue, though—it'll go soggy. Thaw in the fridge overnight and add meringue when ready to serve.
- → What can I use if I don't have cream of tartar?
Cream of tartar strengthens meringue, but you can leave it out. Just avoid overbeating the egg whites. If you want, try a tiny splash of lemon juice as a backup option to help keep them stable. Serve soon after making!
- → Why does the meringue need heating?
Warming the meringue to 160°F ensures food safety and makes the peaks firm and glossy. This technique, known as Swiss meringue, gives silky, stable results that don’t weep or lose shape.
- → How do I check if my meringue is finished?
Your meringue is ready when it looks shiny, holds stiff peaks, and feels smooth when rubbed between fingers (no grittiness). It should pipe easily and hold its form without sinking.